


Movavi Review | My honest experience after 7 days of testing
I am a content creator myself, so I know how crucial it is to find the ideal video editing software for you. So, in this Movavi review, I will share my honest experience after spending 7 days with this video editing software to help you make your decision.
I will not only show Movavi’s tools but also focus on the most important features that most users, including myself, rely on during the video editing process.
Let’s dive into this Movavi review!
What is Movavi?
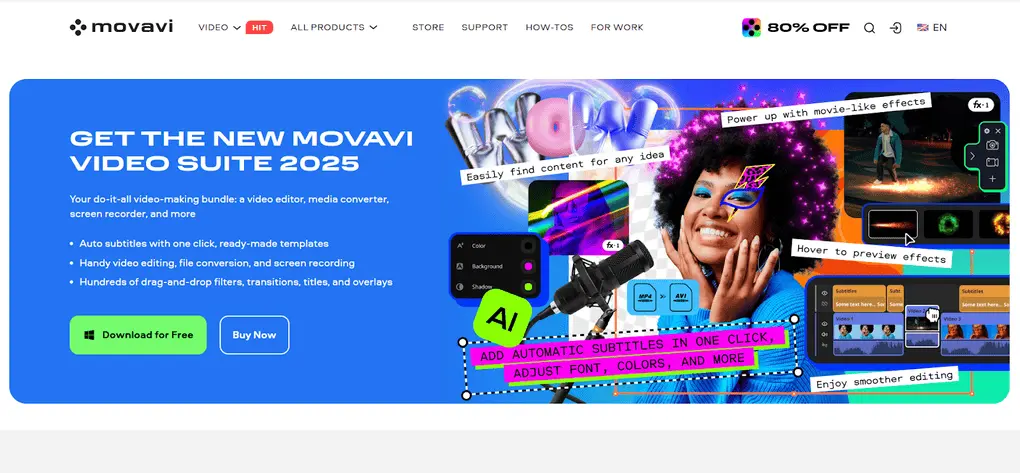
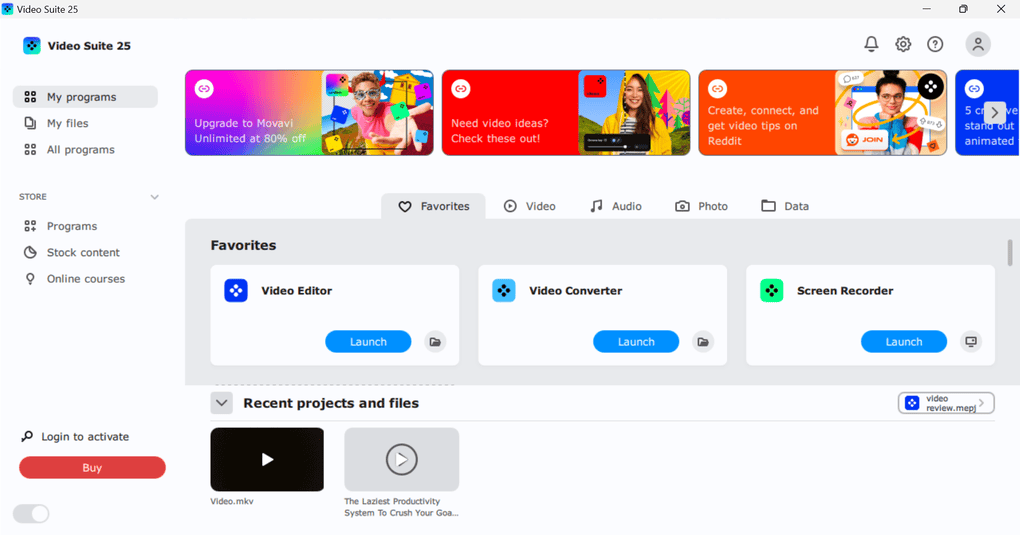
Movavi is a popular video editing software. However, it has far more tools than just ordinary editing software. Movavi offers tools for video and photo editing, video converting, and screen recording as well.
So, Movavi Suite has many tools you can implement to make your content creation workflows more efficient and faster.
Movavi has over 70 million users currently, and the developer team regularly updates the product (+15 updates yearly). You can use Movavi on both Mac and Windows and download it to your Android and iPhone devices. Furthermore, Movavi video editor has a web app where you can edit your videos without downloading the desktop app.
Let’s take a closer look!
Movavi’s key features
It’s time to see the features I used during my Movavi review and testing!
Movavi Screen Recorder
Just like other video editing software, you can either record using your camera or grab what’s on your screen. Let’s start with the camera recording!
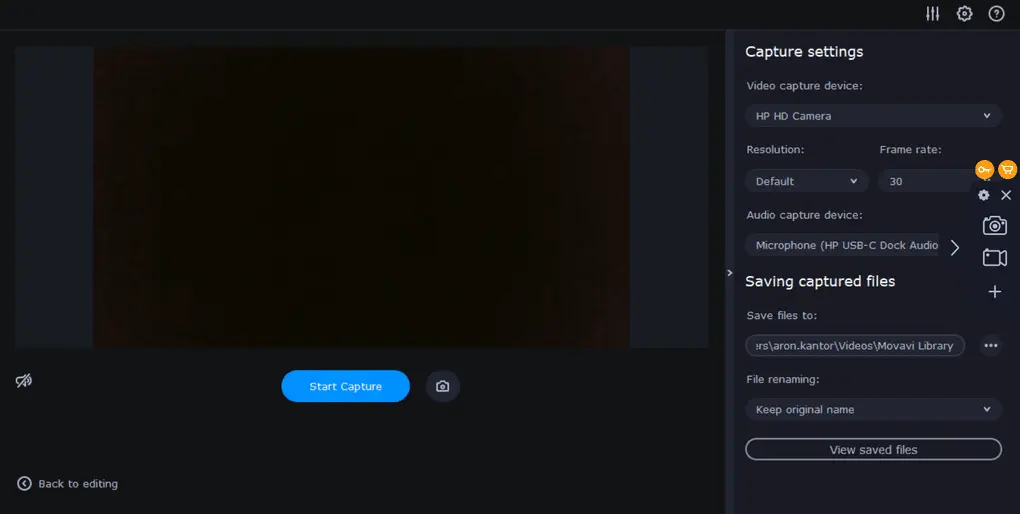
If you click on the recorded video, Movavi will take you to this page. Here, you can select the device, various resolution options, frame rate, and the microphone you want to use for recording.
Nevertheless, Movavi offers some additional options if you click on the preferences. For example, you can disable the countdown, hide the recording panel, and more.
During my Movavi review, I discovered that its screen recorder feature is simply fantastic. It identifies different parts of the screen, so you do not have to manually select what you want to capture. If you click the space tab, Movavi will record your entire screen.
Essentially, these functions help to minimize the clicks and repetitive actions during recording, which helps you to stay in the flow.
If you do not want to record your screen but only do a quick screenshot, you can easily do that with Movavi. You will find this option on the right panel above the screen recorder tool.
It is also fantastic that you can customize this widget, put the features you need, and access them with a single click. While it’s not a huge feature, it is useful during the content creation process, as you do not have to switch between screens and features, and everything is right at your fingertips.
Let’s take a look at Movavi’s video editor tools!
Movavi Video Editor
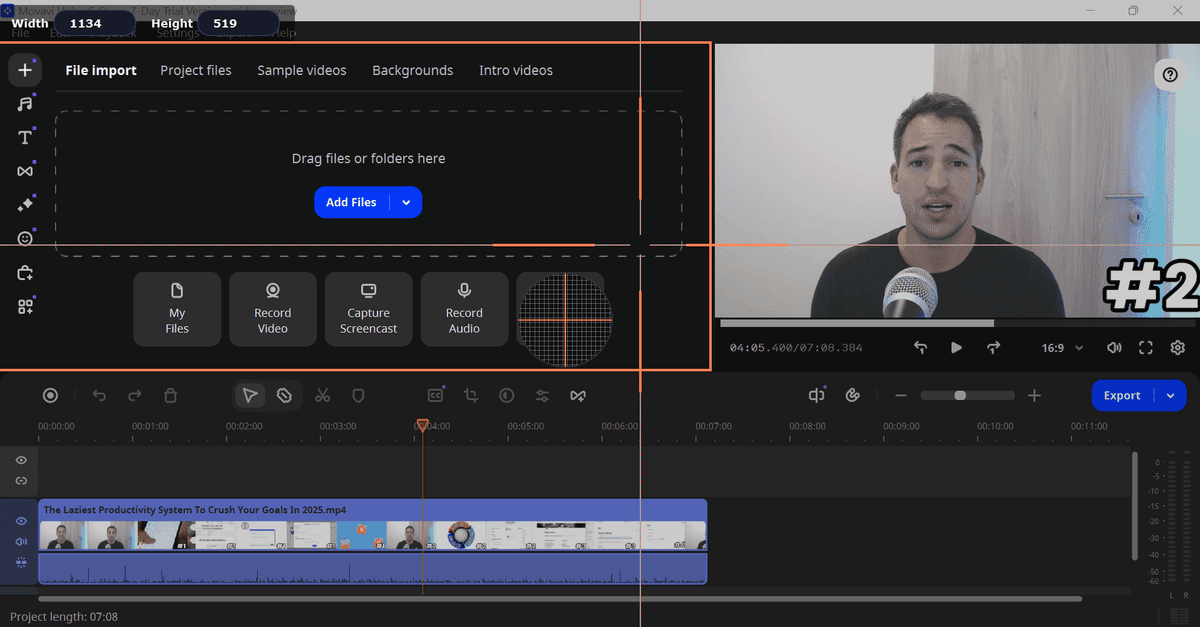
You can access the video editing features above of the video clips, while you can see the video itself on the right side. On the left side, you can see additional features for your video editing, but I will guide you through them later.
When editing videos, I spend a lot of time cutting the raw video into different clips. Normally, I cut the video in 40-80 different video clips, so you can imagine how crucial it is to have the right tools to do this effectively.

Movavi offers two options to cut your recordings into video clips. First, it has the Split option. Many of you who edited videos in the past are familiar with this editing tool. You click on the specific part of your video file, which will split into two video clips.
Nonetheless, one of my favorite editing functions I used during my Movavi review is the Blade. It provides a quicker way to cut your video into different video clips.
Typically, other video editing software only has the Split option. So, when you cut a scene, you need to click on the part you want to cut, and after the split button. In contrast, you can do this with one click with the Blade and move to the next one, which makes the video editing experience more dynamic.
When using the Blade, you simply need to click on the part where you want to split the video into different clips. It is very smooth and saves a lot of time when editing your videos.

Movavi also provides a crop function to cut off the edges of the selected video clips. Besides cropping, you can also rotate the video clip.
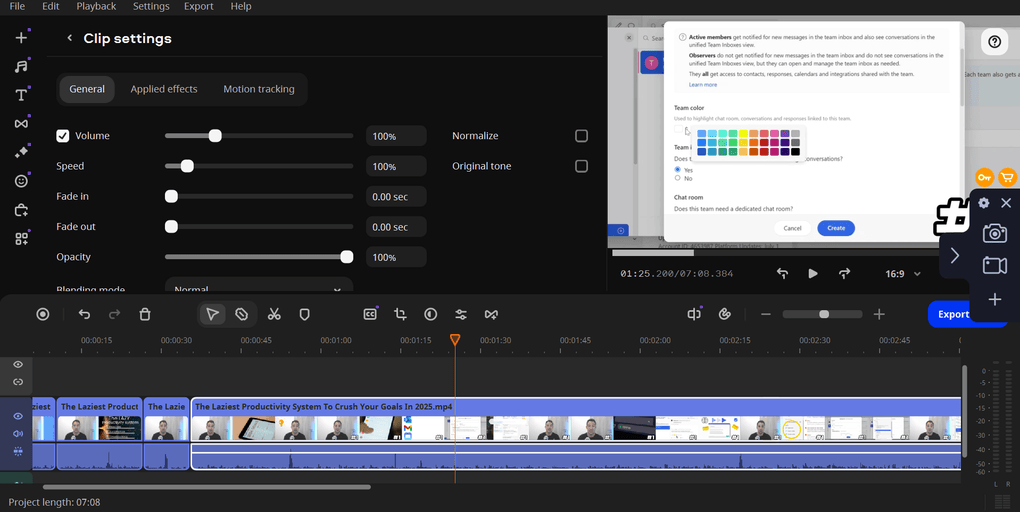
If you click on the video clip settings, you can access additional editing functions. You can change its speed and opacity level or apply fade-ins and outs. Also, you can access the motion tracking tools here.
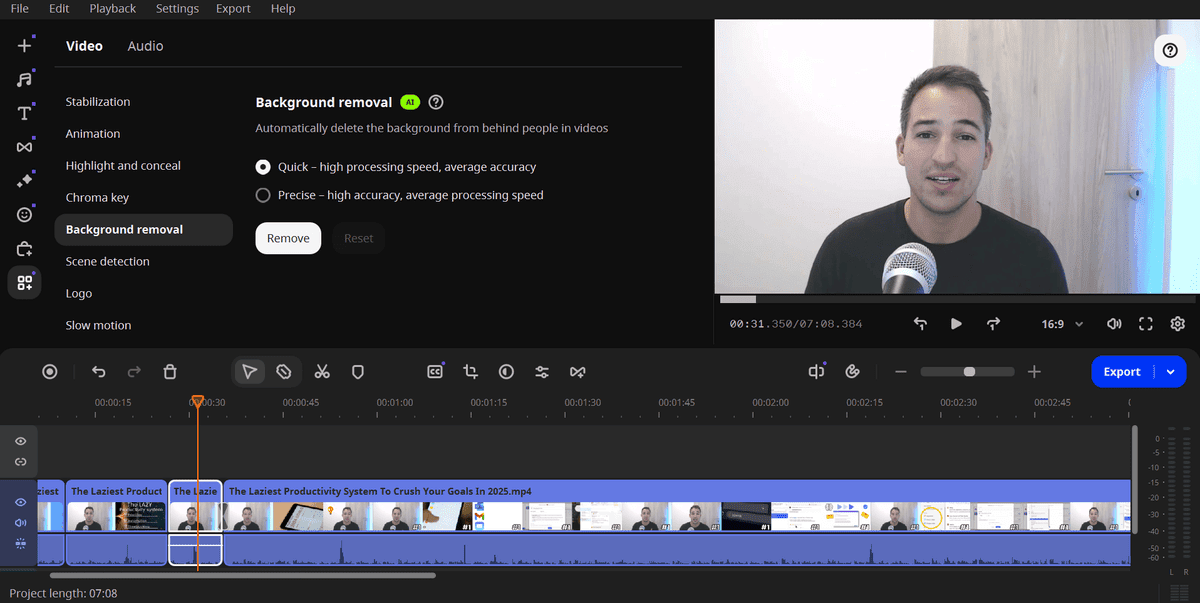
Moreover, Movavi’s Video Editor offers AI background removal. Using this editing feature, you can automatically delete the background from behind you.
Overall, I was very satisfied with Movavi’s Video Editor features, and I have all the features you need to make awesome videos.
Transitions
Here is my confession: I love applying transitions and effects during video editing. They not only help to capture viewers’ attention, but it is also fun for me.
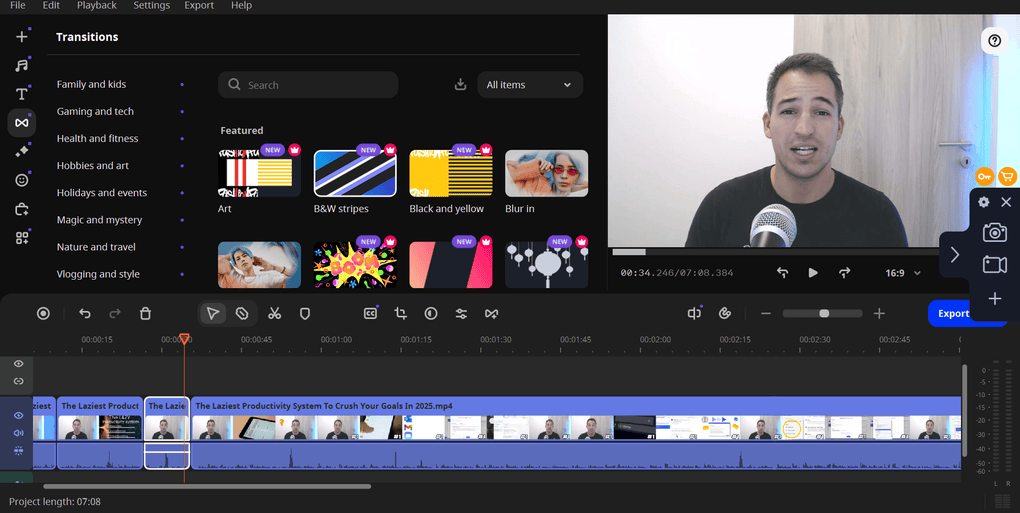
On the left side, you can access the transitions. There are a lot of transitions from basic to more fancier ones.
To make it easier to find the transitions you need, Movavi applies categories like cinematic, abstract, or nature-related transitions. When you click on the transition you want to use, you can see its preview on the right side.
If you like what you saw, you can install it with one click, and you only need to drag and drop it to the part where you want to use it.
Effects and filters

The effects are included in the Movavi Unlimited Plan, or purchase their Effects Store. The Effects Store includes +6,000 effects, rad titles, transitions, stickers, overlays, and background music.
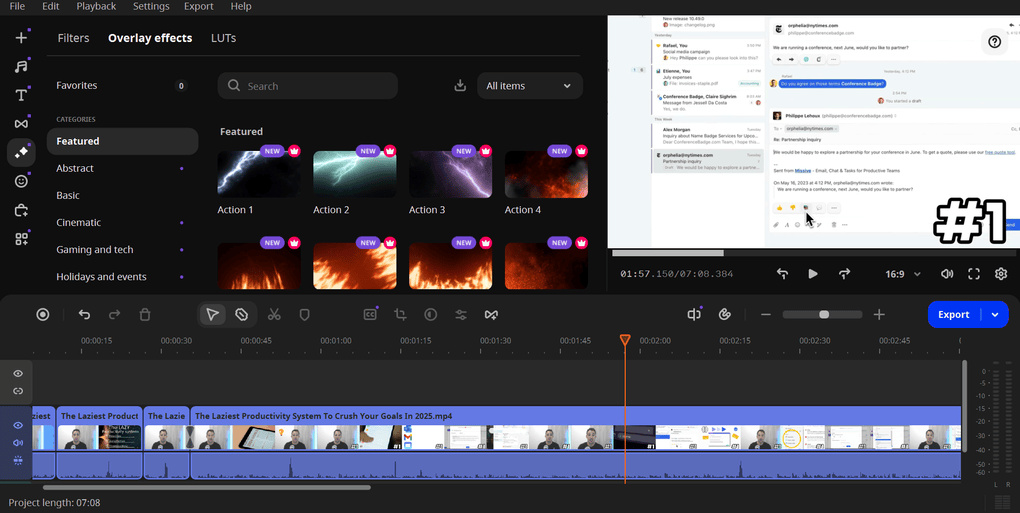
Similarly to the transitions, Movavi structures the effects into different categories so you can easily find what you need.
If you want to try one of them, just click on install, and you can check on the right side how it looks on your video clip.
Furthermore, you can apply filters to your video clips. Whenever you click on the filter you want to try, you can see the preview on the right side.
Audio editing
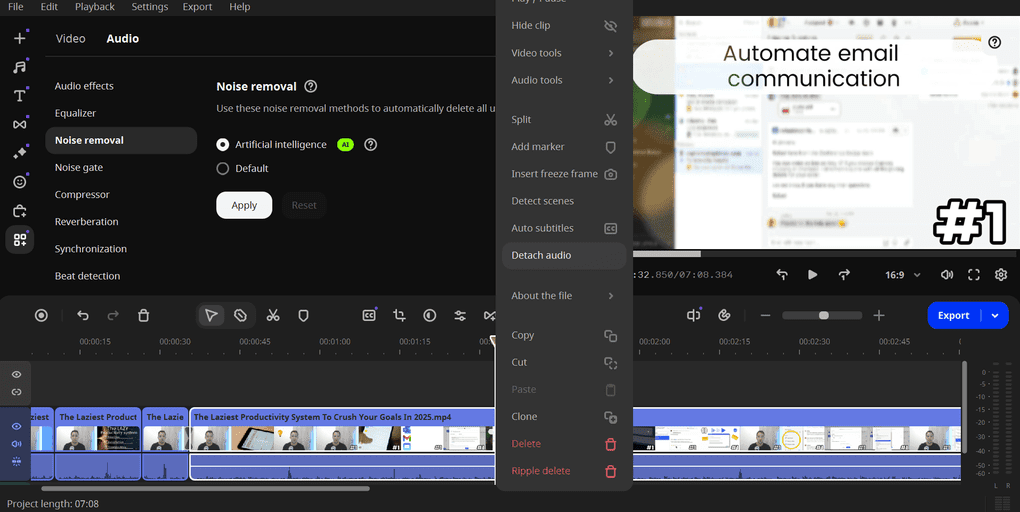
Using Movavi Video Editor, you can easily detach audio from your video clips. Just hit the right-click button, and you will see this option. Personally, I use this many times during my video editing process, so it is great that I can reach it quickly.
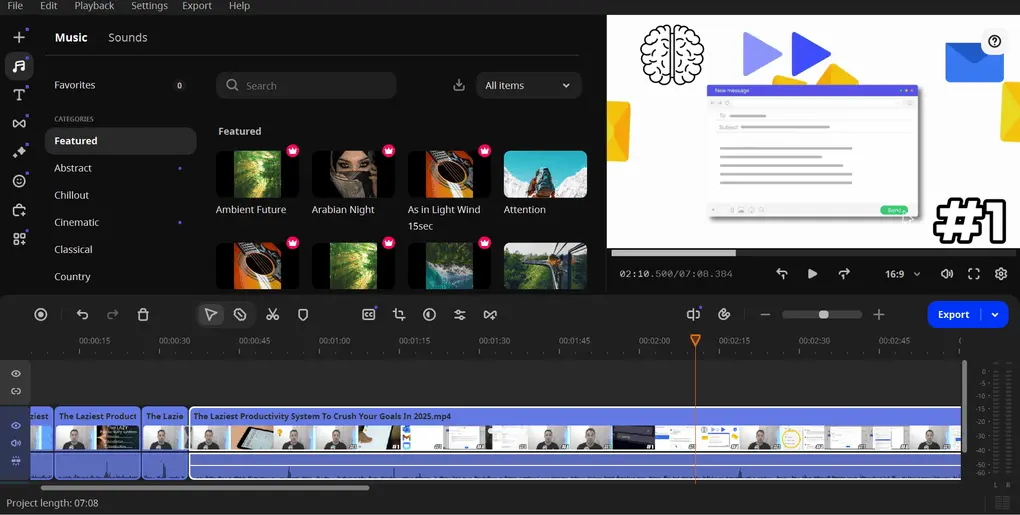
Like other video editing tools, you can easily change the volume, and has all the tools you need for audio editing. During my Movavi review, I discovered it has a massive music and sound library.
Similarly to the previous features, Movavi uses categories to help you find the right background music or sound easily.
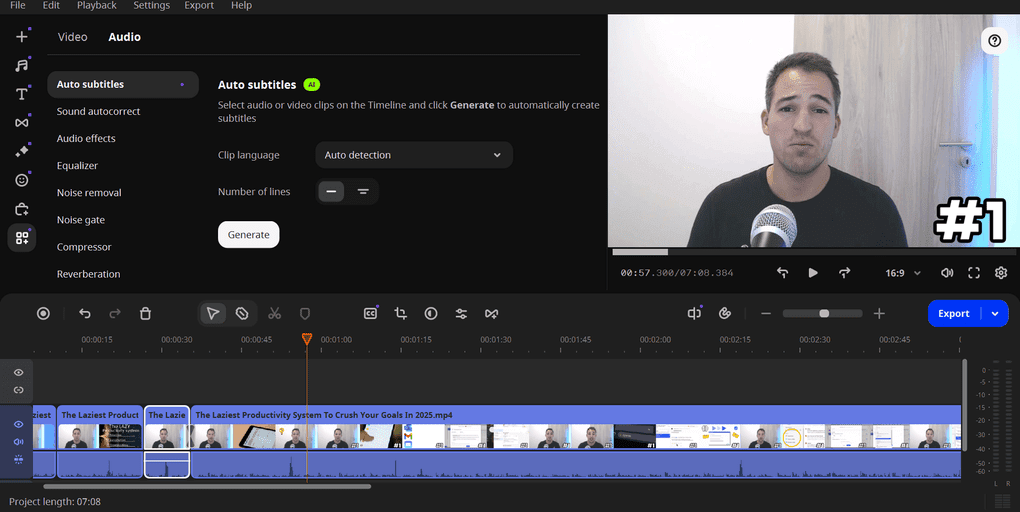
Besides the basic tools, Movavi offers some advanced features, including AI tools when it comes to audio editing. For example, you can generate auto subtitles, apply an equalizer, or use its noise removal function.
Elements
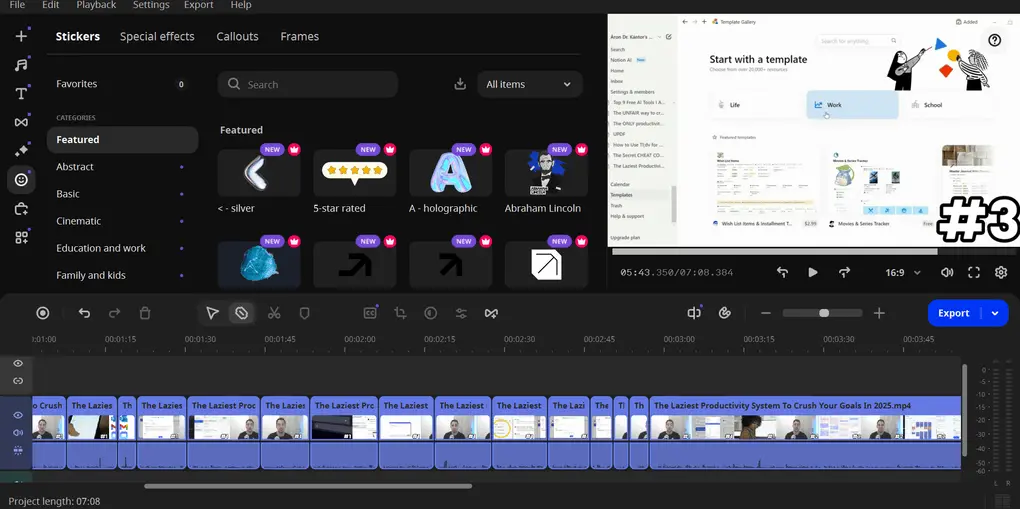
You can choose from four types of elements when using the Movavi. First, you can use stickers for your video clips.
There is an almost infinite number of stickers, so you will surely find the one you need. I also recommend adding the frequently used stickers to your favorites. This way, you can reach them easily.
Once you select the sticker you want to use, you only need to drag and drop it to the part where you want to show it to the viewers.
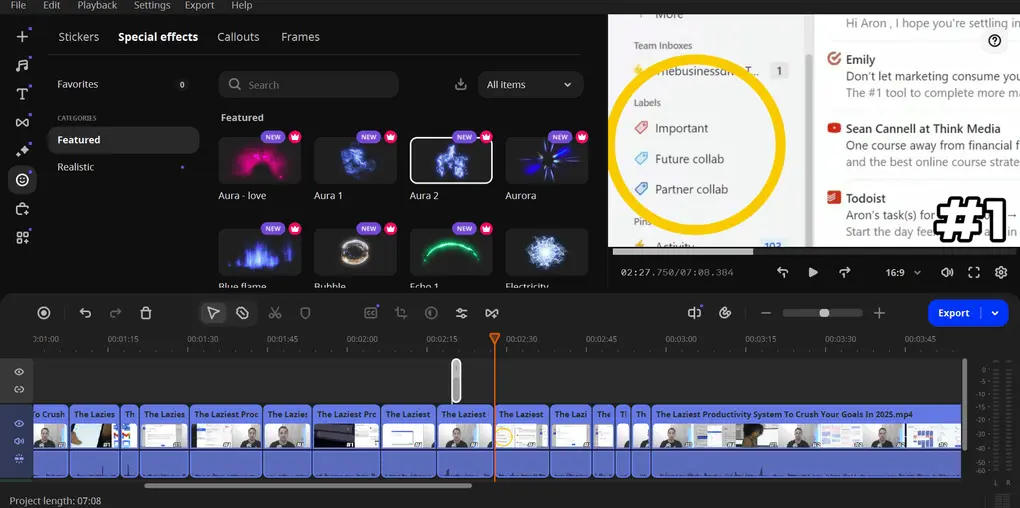
In addition to stickers, you can add special effects to your video clips. For instance, you can insert fire or flash effects.
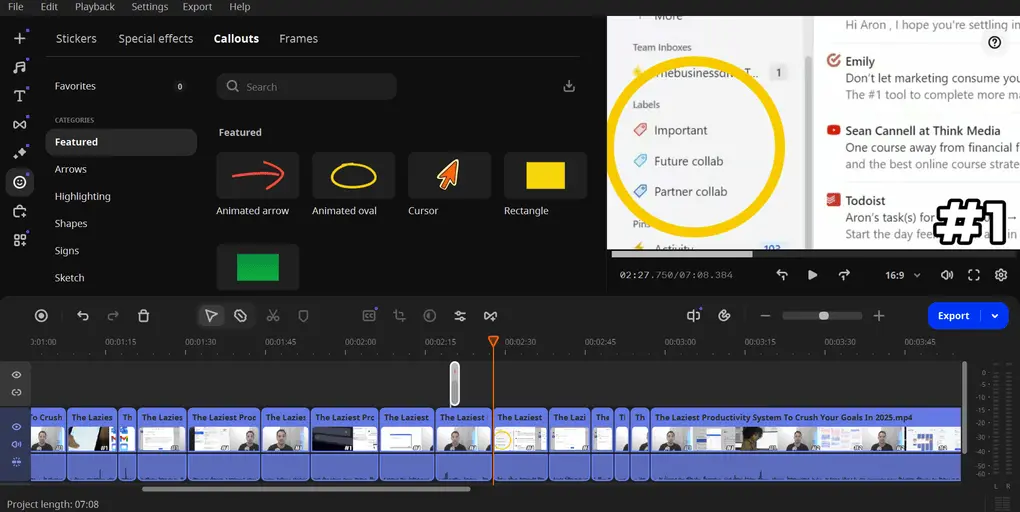
Moreover, Movavi allows you to add callouts to your video clips. I use a lot of callouts in my YouTube videos, especially when it is a tutorial, so I really appreciated this function.
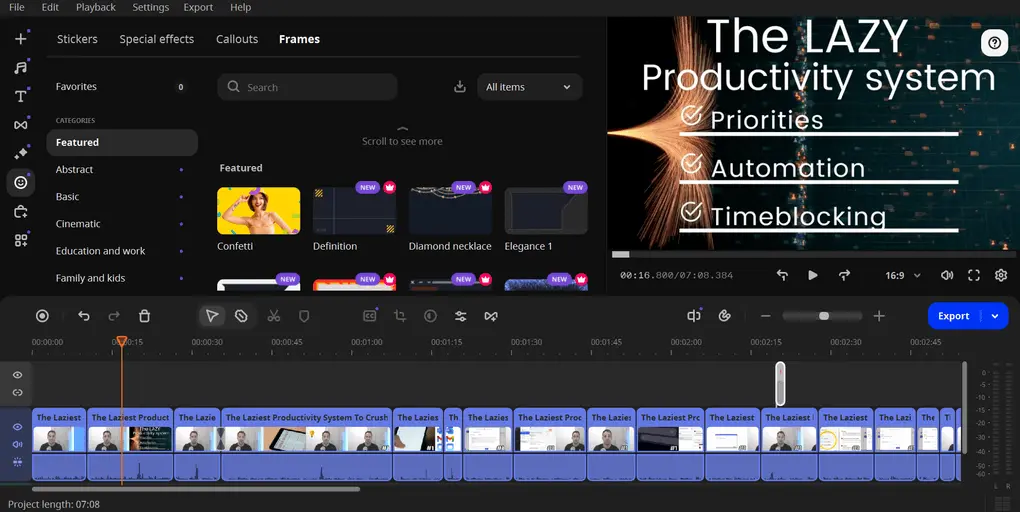
Lastly, you can choose from many frames. Such frames can be valuable for creating your themes and style for YouTube videos.
Titles
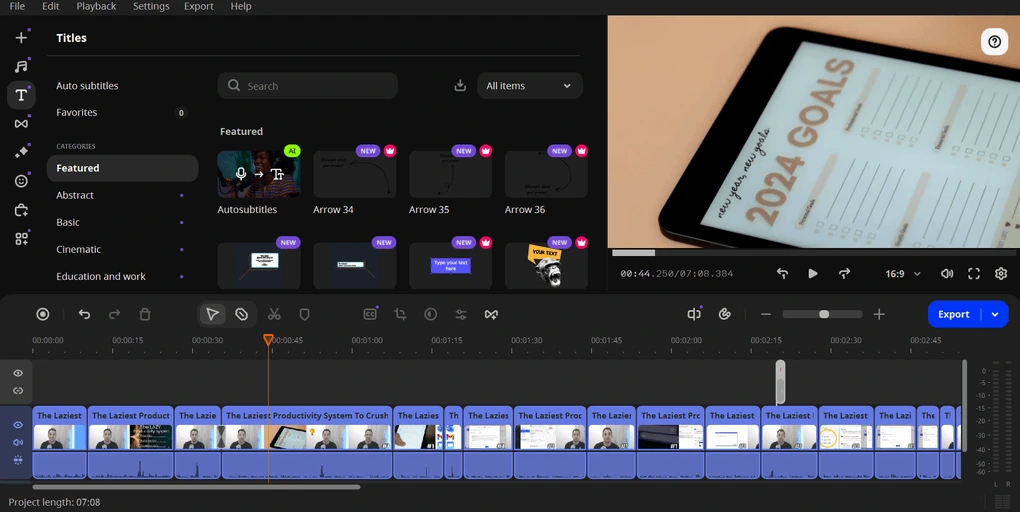
Tiles and text elements are also among the video editing tools I regularly use. After you drag and drop the text on your video clips, you can adjust numerous parameters.
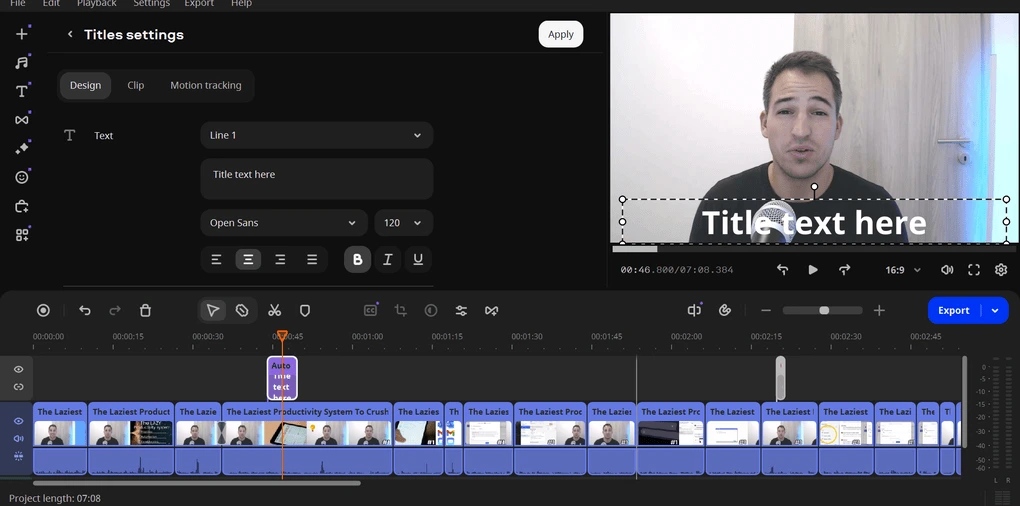
You can change its size, color, and font type and have many options to personalize its design to your style. It is an easy-to-use video editing feature and works the same as other video editing functions I showed you previously.
Animation
I also checked the animation features during my Movavi review. This is something I also use when editing my YouTube videos.

With Movavi Video Editor, you can apply animations for video clips or the elements on the scenes. There are more basic animations, but you can access some advanced features as well.
Personally, I think these options are sufficient for my videos.
Image and video library
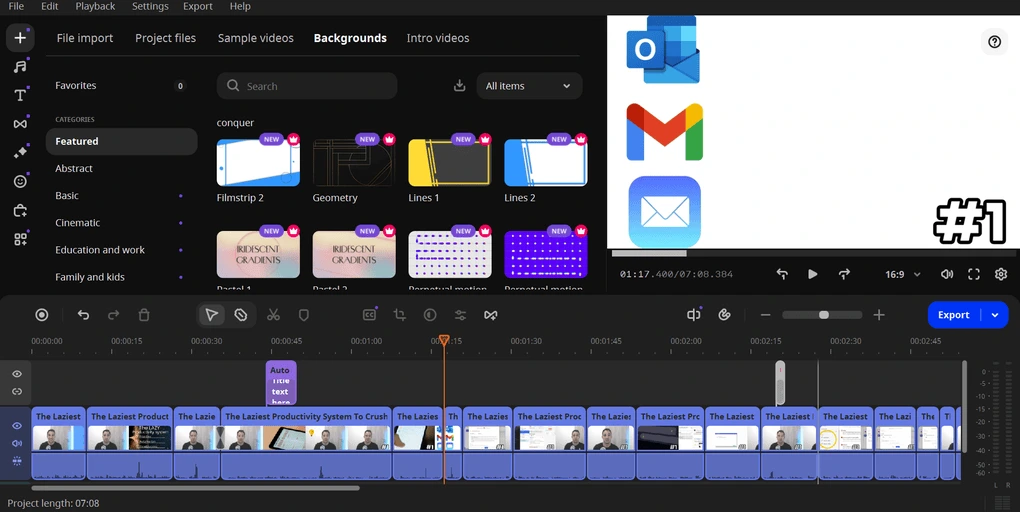
Movavi Video Editor has a library of images and videos. When it comes to the images, it offers some background pictures for your videos. I do not use too many stock images for my videos, but such a feature can be useful for many of you.
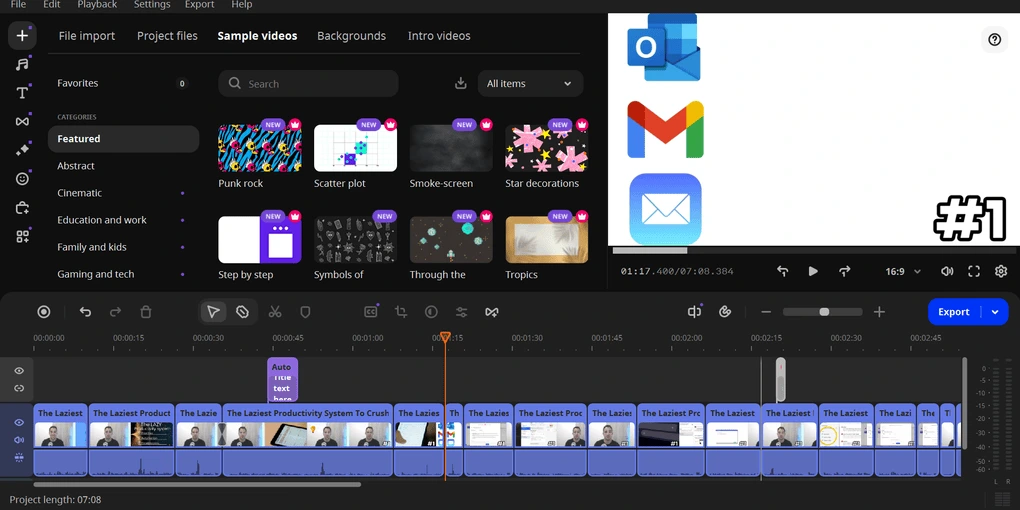
Moreover, you can add sample or intro videos when editing your video. If you want to kick off your video editing journey, the intro videos will be a very practical feature, as you do not have to deal with manually preparing your intros and outros but simply choose one that you like and upload your logo.
Movavi Video Converter

Movavi Video Converter helps you to quickly convert media files into other formats. But it can do more than just convert files.
With this feature, you can compress media files to optimize storage, speed up uploads, and ensure smooth playback time. Also, using its AI upscaling tool, you can improve the resolution of your videos.
It also has a built-in trimming tool, so you can cut out pauses and other unwanted parts of your videos.
Movavi’s interface
Movavi has a user-friendly interface. I have been using video editing software for over a year, so I had a very smooth experience navigating and finding the video editor features I needed.
Therefore, it is safe to say that if you have some experience in video editing, Movavi will not have a learning curve. If you are someone who is a complete beginner in terms of video editing, I believe you will have a short learning curve.
Of course, you need to learn how to edit a video and what tools you have to use, but it is part of the learning process and has nothing to do with the learning curve of the video editor software.
Movavi’s pricing
Movavi offers a seven-day trial. All Movavi products, including the Movavi Video Suite, Movavi Video Editor, Movavi Video Converter, Movavi Video Recorder, etc., have trial versions allowing you to take the program for a test drive and see whether it is the right video editor.
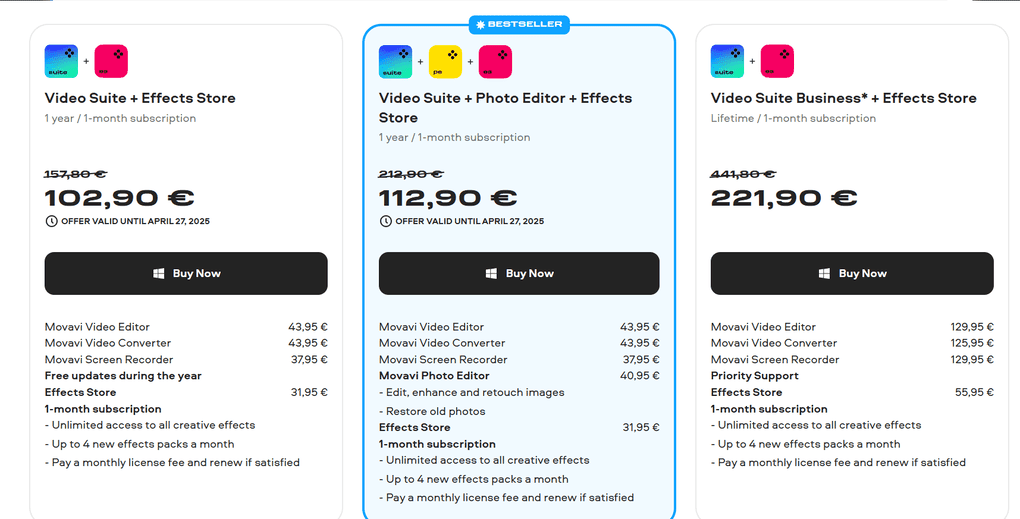
When it comes to Movavi’s paid version, the first package is the Movavi Video Suite, plus the Effects Store, which you can get for €157,8 per year. The Movavi Video Suite covers the Movavi Video Editor, Movavi Video Converter, and Movavi Screen Recorder as well for a year.
However, only one month of Effect Store is included in this plan, so if you need it for the whole year, you need to buy it separately.
If you need the Photo Editor as well, you have to buy Movavi’s second package for €212,9 yearly. This plan also includes a one-month Effect Store subscription.
Finally, Movavi offers its Video Suite Business plan, which gives you one-month access to Effect Store and lifetime access to Movavi Video Editor, Movavi Video Converter, and Movavi Screen Recorder. For this plan, you have to pay a one-time fee of €441,8.
My experience with Movavi
Overall, I had a quite pleasant experience during my Movavi review. Movavi’s interface makes the navigation smooth, and it has ease-of-use video editing tools.
I particularly loved its Blade tool, which helps to cut the time spent with video editing. Also, it has a very solid library of effects compared to other video editors.
Furthermore, Movavi offers some useful personalization options with its widget on the left side. Again, this is a small thing, but such features really matter when you spend +10 hours with video editing.
And lastly, its screen recorder feature was great. For someone like me who takes a lot of screenshots and screen recordings, it is a valuable feature.
Movavi’s pros and cons
Let’s see the pros and cons I discovered during my Movavi review.
Movavi’s pros
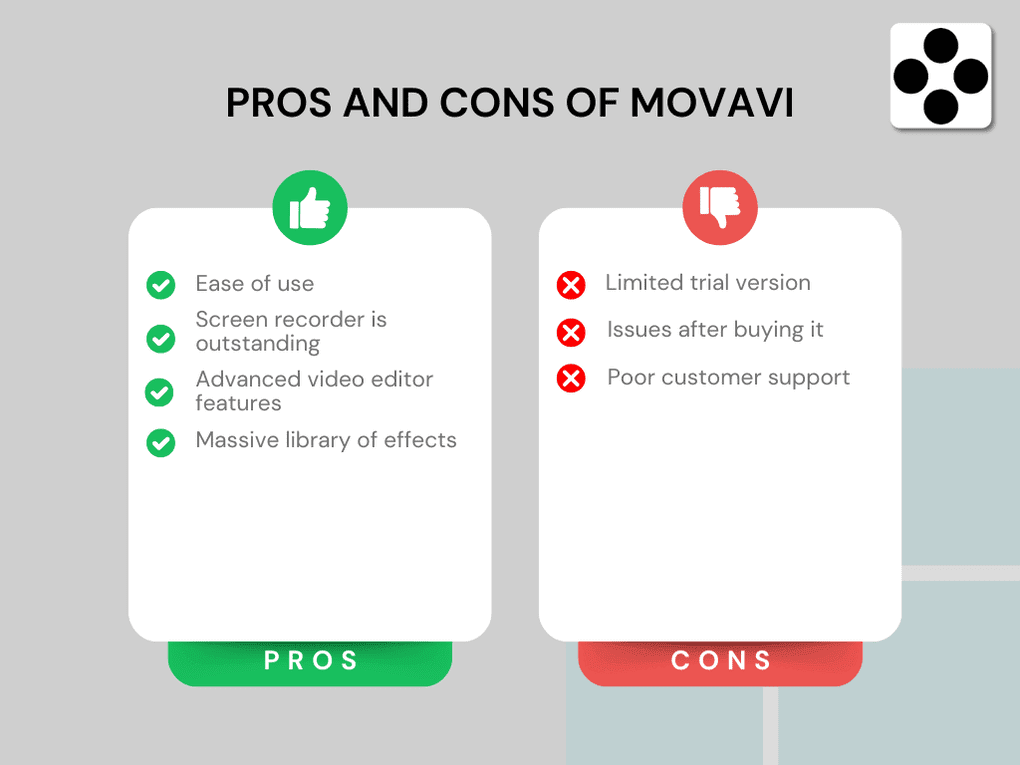
First, one of the significant pros of Movavi is the ease of use. With its user-friendly interface and smooth navigation, you can easily find and utilize all the features you need for video editing.
Secondly, its screen recorder is outstanding. The way that it can automatically identify the parts of your screen is awesome.
Moreover, Movavi has advanced video editor features.
Finally, it has a massive library of effects. Movavi offers +6,000 effects, so you can easily find the most suitable ones for your videos.
Movavi’s cons
The first con I saw during my Movavi review is its limited trial. So, it only lets you export 60 seconds of your video.
Secondly, numerous people reported poor customer service.
Lastly, some of our readers reported issues with Movavi after buying it. You can check out the comments under this article.
Summary: Movavi review
Although I had a positive experience with Movavi, some users did not feel the same. During my Movavi review, I found some hidden gems that make the content creation process faster and help to make engaging videos. It is also a plus for me that Movavi has regular updates, so you can implement the new features and the latest trends in your video editing process.
However, there are some limitations of this video editor. Based on our readers’ feedback, it has poor customer service and faced some problems when they bought the lifetime version.
I hope I was able to help you guys. As always, I will update this Movavi review over time so you guys have up-to-date information about this tool. If you have any questions, feel free to contact me using the contact form, and I will be happy to answer them.
Related articles:
- Vidnoz AI Review: Is it the Best AI Video Generator? (Tried & Tested)
- Step-by-Step Murf AI Tutorial For 2026 | 7 EASY Steps
- An Honest Submagic Review: An Exciting Video Editor (2026)
Why you can trust our reviews
At thebusinessdive.com, our team tests, reviews, and compares hundreds of productivity apps every year — from project management tools to note-taking apps. We dive deep into real-world use cases to help you find the right tools that actually improve your workflow, not just add noise.
Our mission? No fluff, no shortcuts—just honest, hands-on insights from productivity pros.
Discover how we stay transparent, read our review methodology, and let us know about any tools we missed.
Frequently asked questions
Is Movavi a good program?
Movavi is a great video editing software. It is an easy-to-use tool that offers all the tools you need to make captivating videos. After my Movavi review, I can highly recommend it.
Can I trust Movavi?
Based on the available information, Movavi is a safe video editor. Movavi’s products do not contain any malware and can not harm your device or privacy.
Is Movavi really free?
Movavi offers a free trial that allows you to explore its features and decide if it fits your expectations. The free version included the Movavi Video Suite, Movavi Video Editor, Movavi Video Converter, and Movavi Video Recorder as well.

Hey there! I am Aron, the founder of Thebusinessdive. I have been testing productivity apps for almost three years now. I reach 25.000 -50.000 people monthly with the mission to help you find the perfect productivity apps. Subscribe to my YouTube channel, newsletter, and social media to hear more about the best productivity tools. Let’s dive in!
Movavi has absolutely no support for the original AVI format and their software engineers have confirm that support of AVI format will never happen. I have the email from Movavi support to prove this. The software might be good for contemporary video format that are common within the last 10 years but no guarantee of older A/V formats from videos made from camcorders from before 2006.
Hey David, Thanks for the feedback, it’s really valuable for our readers! Cheers, Aron
I agree %100. Zero Support. Poor outcome of quality with delays. Refused to refund with no support. Stay away from this product!
I bought Movavi Video Editor 2024. I received a notification that an update was available. I clicked on it, and it was added. But now I can no longer use the program! Only if I repurchase it. Movavi constantly manipulate me and insistence into buying a new version.What I’m not happy about is their on buying a new version. I find it very annoying to constantly receive those pop-ups. The ads are also very annoying.
Hey Jeen,
Thanks for the feedback, appreciate it! We did not notice it when testing, but will incorporate this into the article.
I downloaded the free version. It worked well. I decided to purchase the software. It worked great until one day a pop up stated I needed to update the app. I could no longer run the app without updating. I ran the update and it required I “purchase” the app before it would run. I purchased the “lifetime” version. It ran for a few months until the latest update came out. Once again, the app would not load unless I downloaded the update. Once again they stated I needed to “purchase” the software before it would run. Never mind I purchased the “lifetime” version. Now it won’t run. Period. What a waste of money. DO NOT PURCHASE THIS SOFTWARE. IT IS A SCAM.